Description
VIVE Mars CamTrack
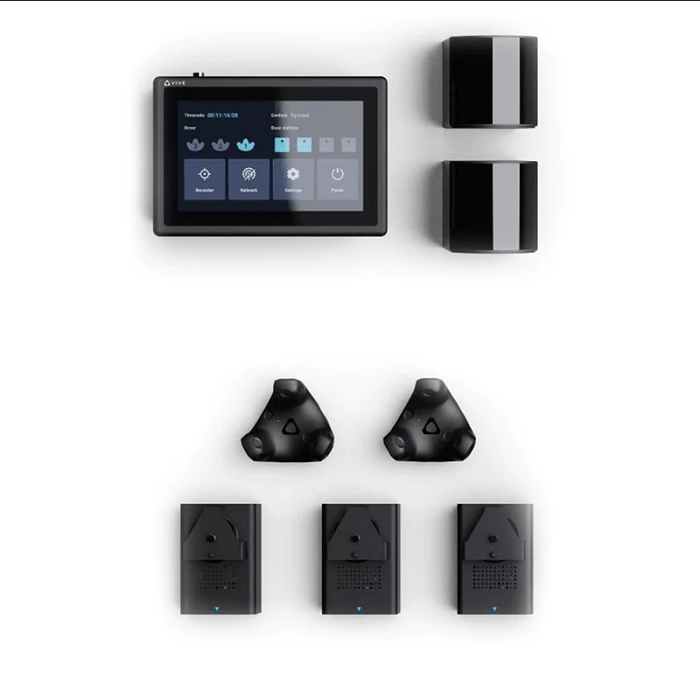
VIVE Mars CamTrack is a solution that integrates VIVE Tracker (3.0), SteamVR Base Station 2.0, and a suite of other devices and tools to help you incorporate VR tracking technology into your virtual production projects.
Virtual production for all, from indie creators to big studios.
HTC VIVE is helping level the field in film making with its first dedicated entry into virtual production — VIVE Mars CamTrack. The cost-effective solution provides accurate camera tracking for live video compositing with a set-up time that only takes minutes.
VIVE Mars simplifies virtual production — letting content creators focus on what’s important, creating.
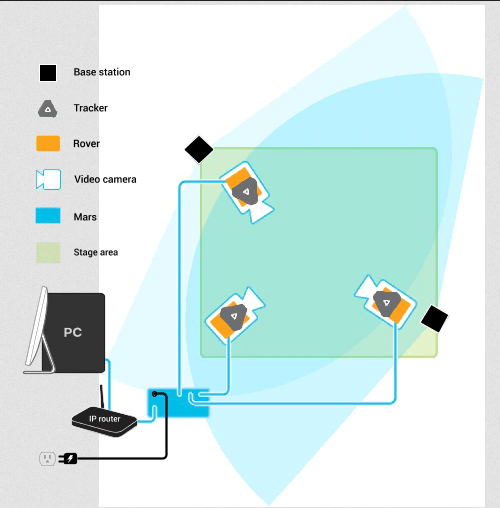
Hardware
SteamVR Base Station 2.0
SteamVR Base Station 2.0 uses advanced optics to determine the exact location of each VIVE Tracker (3.0) and Rover module.
Important:
- The base stations transmit signals to VIVE Tracker (3.0). Make sure the lines of sight between the base stations and the VIVE Tracker (3.0) units are not obstructed.
- The signals transmitted by the base stations may interfere with nearby infrared sensors, including those used by infrared remote controls.
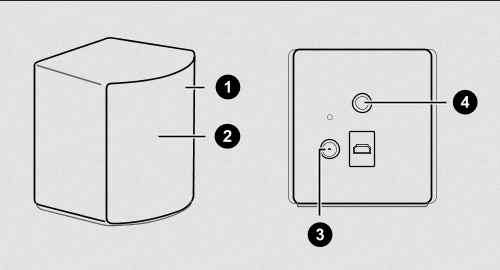
- Status light
- Front panel
- Power port
- Threaded mounting hole
VIVE Tracker (3.0)
VIVE Tracker (3.0) sends location data to the Rover module it’s attached to.
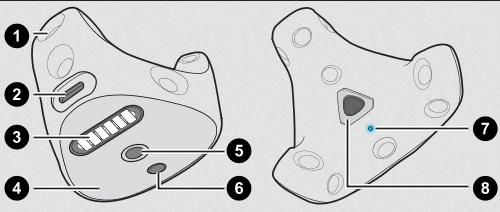
- Sensors
- USB Type-C port
- Pogo pin port
- Friction pad
- Standard camera mount
- Stabilizing pin recess
- Status light
- Power button
Rover
Rover sends tracking data from VIVE Tracker (3.0) to Mars.
Rover collects tracking data from VIVE Tracker (3.0) and relays it to Mars to refresh the signal and prevent signal degradation.
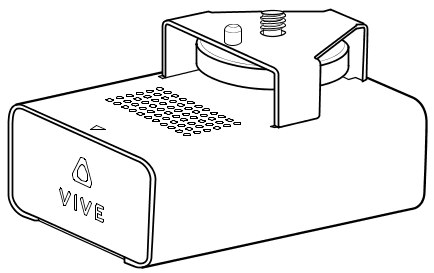
Rover is also responsible for transmitting FIZ (focus, iris, zoom) data that the lens encoder can convert into data that can be used by virtual production engines. VIVE Mars CamTrack supports the LOLED Indiemark lens encoder.
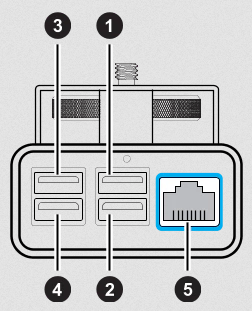
1 USB Type-A port 1 Primary connection port for VIVE Tracker (3.0)
2 USB Type-A port 2 Zoom data can be transmitted through this port
3 USB Type-A port 3 Focus data can be transmitted through this port
4 USB Type-A port 4 Iris data can be transmitted through this port
5 Ethernet port For connecting Rover to Mars to transmit tracking data
Mars
Mars collects tracking data from each Rover and sends it to your PC through an IP router.
Mars allows you to manage each connected device and check relevant information through the Mars dashboard, which is located directly on the top side of Mars.

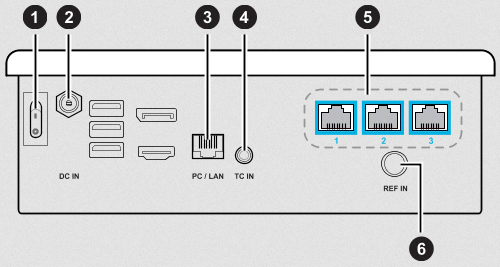
- Power switch For powering Mars on and off
- DC power input For connecting Mars to power
- PC/LAN port For connecting to IP router
- TC input For connecting timecode generator
- Ethernet ports For connecting Rover units
- REF input For connecting genlock generator
Mars dashboard
The Mars dashboard displays the connection status of each connected hardware device and other system-related information. You can also access several system configuration options.
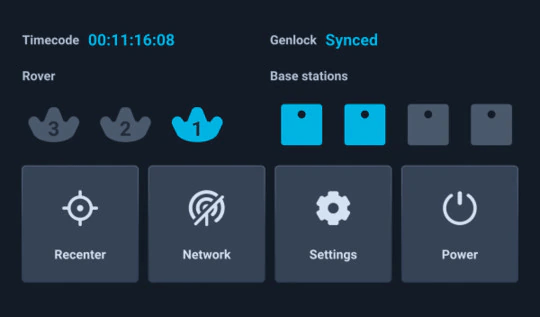
- Rover: The status of each Rover module is represented by a VIVE Tracker (3.0) icon.
Solid gray No Rover module is detected. Flashing gray The Rover module is booting up. Flashing blue VIVE Tracker (3.0) is detected but not tracking yet. Solid blue VIVE Tracker (3.0) is detected and tracking. - Timecode: Displays the timecode from a connected camera or sync generator.
- Genlock: The status Synced will be displayed when an external sync generator is connected.
Note:
An external sync generator is required to use this feature.
Base stations: Displays the connection status of each base station.
Recenter: Reset the coordinates of a tracker to a positional origin (neutral coordinates).
Network: Displays the IP address when the network status is active. Tap to configure network settings.
Power: Tap to restart or power off Mars.
Settings: Configure additional settings and check for system updates. You can also export system logs for system diagnostics and analysis.
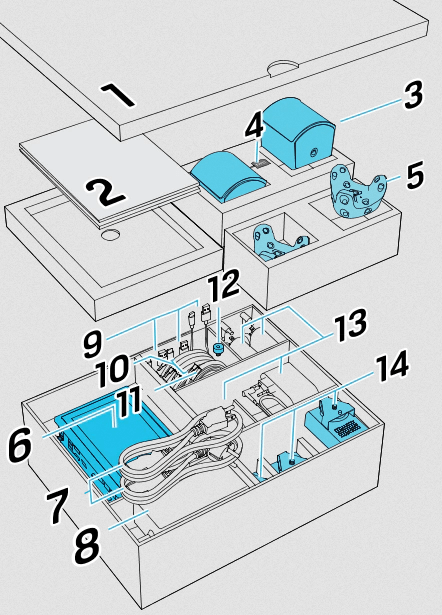
Calibration kit
The calibration kit includes items for assembling the calibration board, which is placed inside the tracking area during the camera calibration process.
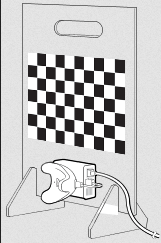
The calibration kit includes an acrylic calibration board with a chessboard pattern, which is used as the calibration target during camera calibration. The kit also includes base supports for the board and a screw for attaching a Rover module and VIVE Tracker (3.0), which is used to determine the location of the calibration target.
After setting up VIVE Mars CamTrack, you’ll need to assemble the calibration board and attach a Rover module and VIVE Tracker (3.0) to it. You can then place the board inside the tracking area and start the calibration process. For details, see Setting up the calibration board and Collecting calibration data using the Camera Calibration Tool.


